
Product Reviews
Product/Service: Factory
Pro Shift-Kit
Manufacturer/Provider: Lockhart
Phillips USA
Reviewed by: Jeff Kufalk
One thing which I view as a plague on the Honda bike is the straight cut transmission. Granted, it has its purpose, but shifting can sometimes be 'iffy' and 2nd gear seems to go out quicker than on an undercut transmission.
Without undercutting the transmission, the one thing which you can do is to install a Factory Pro Shift-Kit. Basically it just replaces the shift detent arm and actuator spring, with a all-bearing arm, and heavier spring.
[insert boring technical stuff] When you shift, you push the lever down or pull it up. It runs a rod which indexes the shift drum. The shift drum moves the forks in the transmission which selects the gear. However, movement of the shift drum is initiated by the indexer (attached to the rod attached to the foot control), but FINISHED by the detent arm and spring which stop the drum at the exact spot needed for gear selection.
I used the shift kit from an F2/F3/F4/F4i as they are the same parts needed in the RR. Here's the whole process...
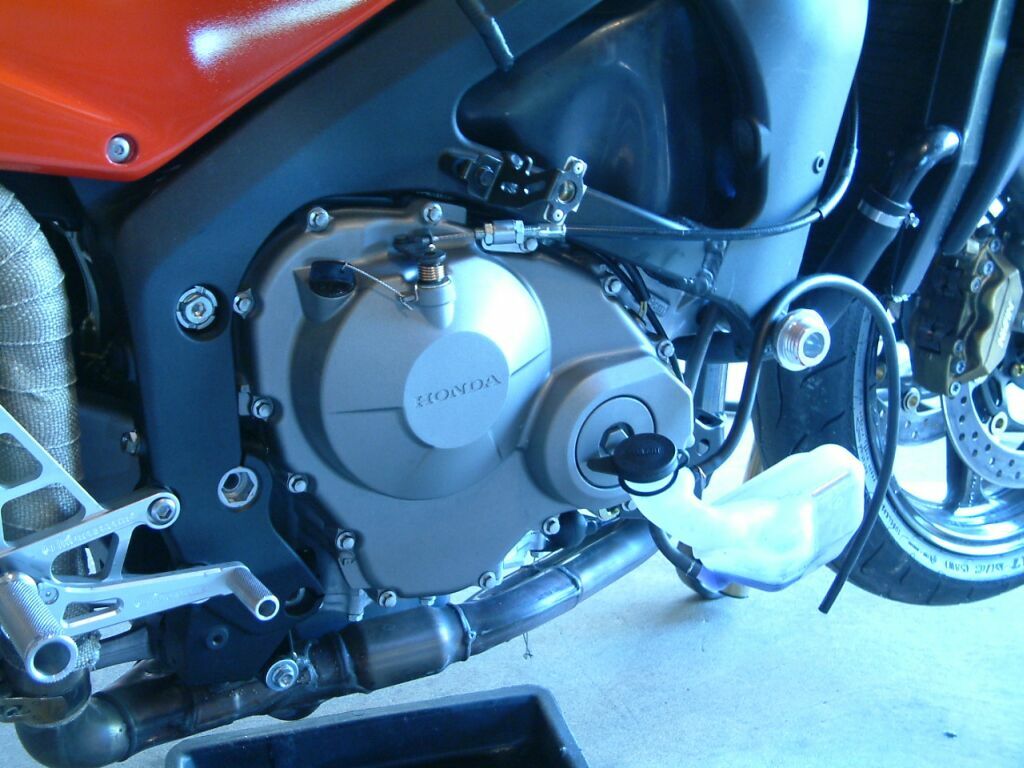
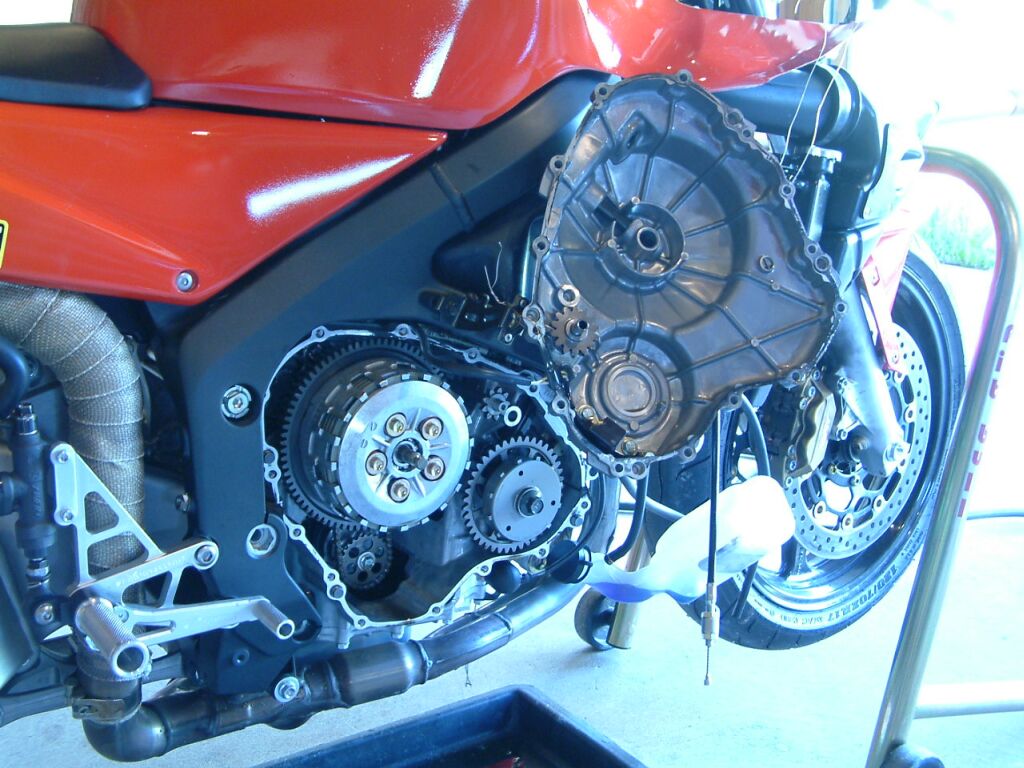
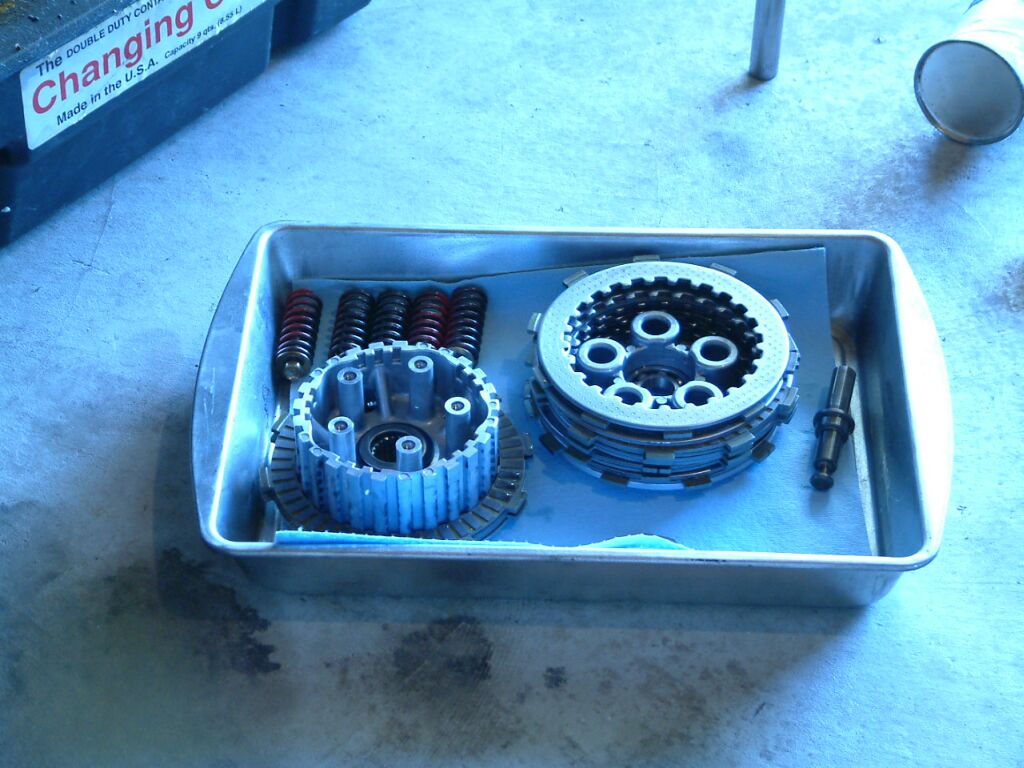
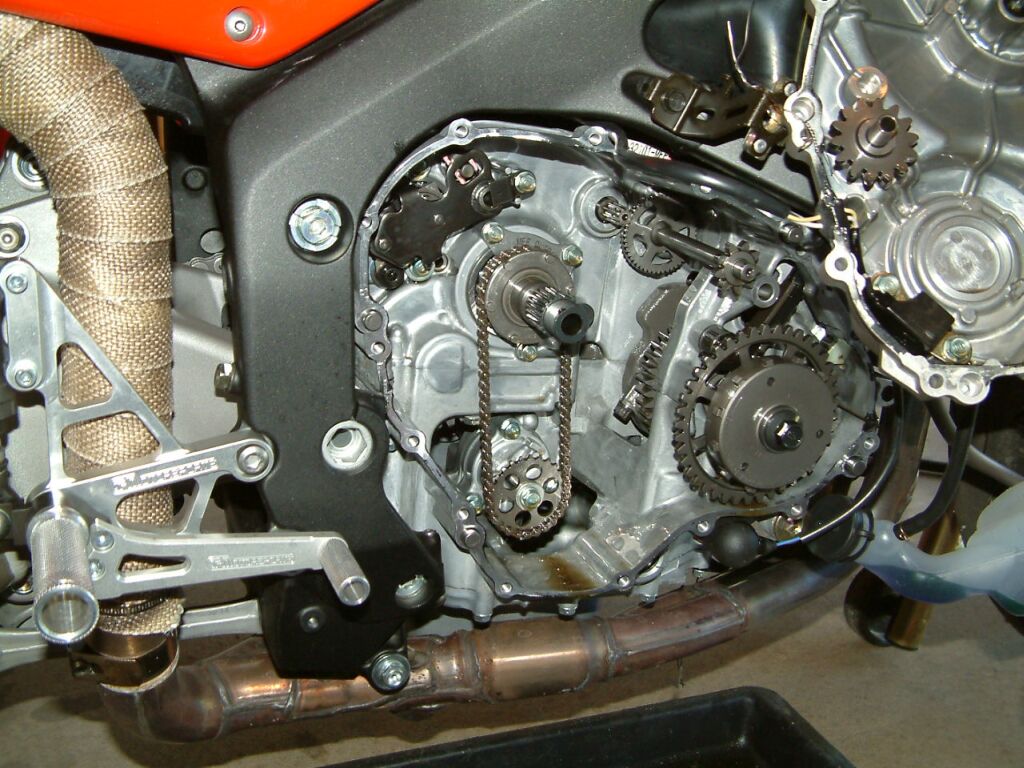
This is best done during an oil change as you will lose oil (unless you tip the bike to the left). I was due, so I drained the oil and went at it. Remove the right side plastics, the clutch cover, the 5 spring bolts, springs, steels and friction plates.

KEEP THE PLATES IN ORDER!!!
In order to remove the Center Stake-Nut from the clutch drum, I would HIGHLY recommend (if not insist) that you use an air impact wrench. There are commercial tools available (which the service manual says to use) which hold the clutch drum, but I've broken more drums than I've held successfully. It's just not worth the risk. If you don't have an impact wrench, borrow one. If you can't borrow one, take the bike somewhere to have the nut removed. If you risk using the tool, don't be pissed when you break the drum...
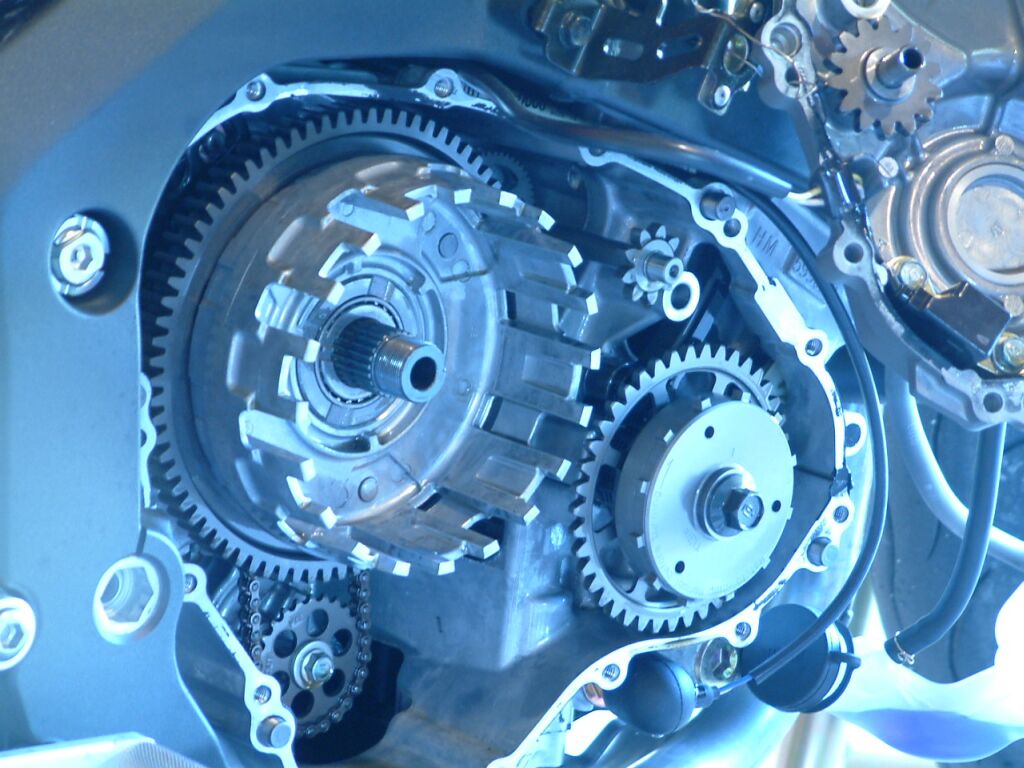
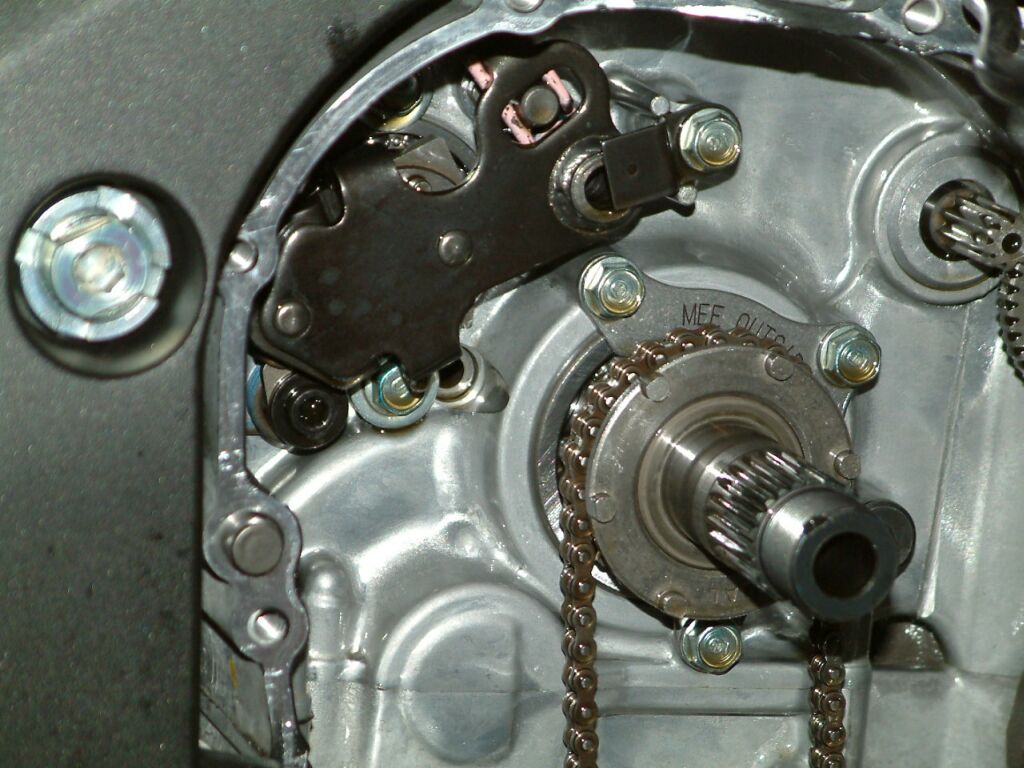
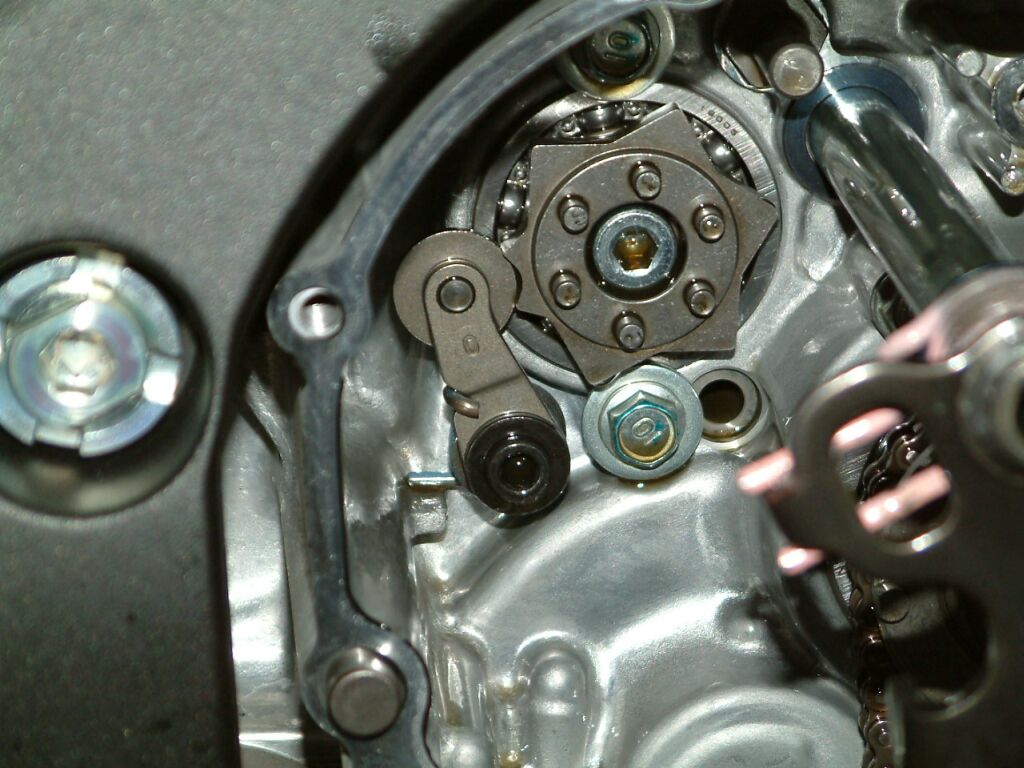
With the guts out, we can finally see what we're doing here. The black armature in picture 2 (close-up) is what is attached to the shift rod and ultimately the foot control. It indexes the drum "star" underneath it (directly attached to the drum) which is controlled ultimately by the detent arm and spring (see close-up in pic 4).
BEFORE YOU REMOVE ANYTHING here's a hot tip. Take a paper plate or something and BLOCK the hole going down into the oil sump. If you don't, you will inevitably drop something into the oil sump, and then will have to pull off the oil pan to find it.
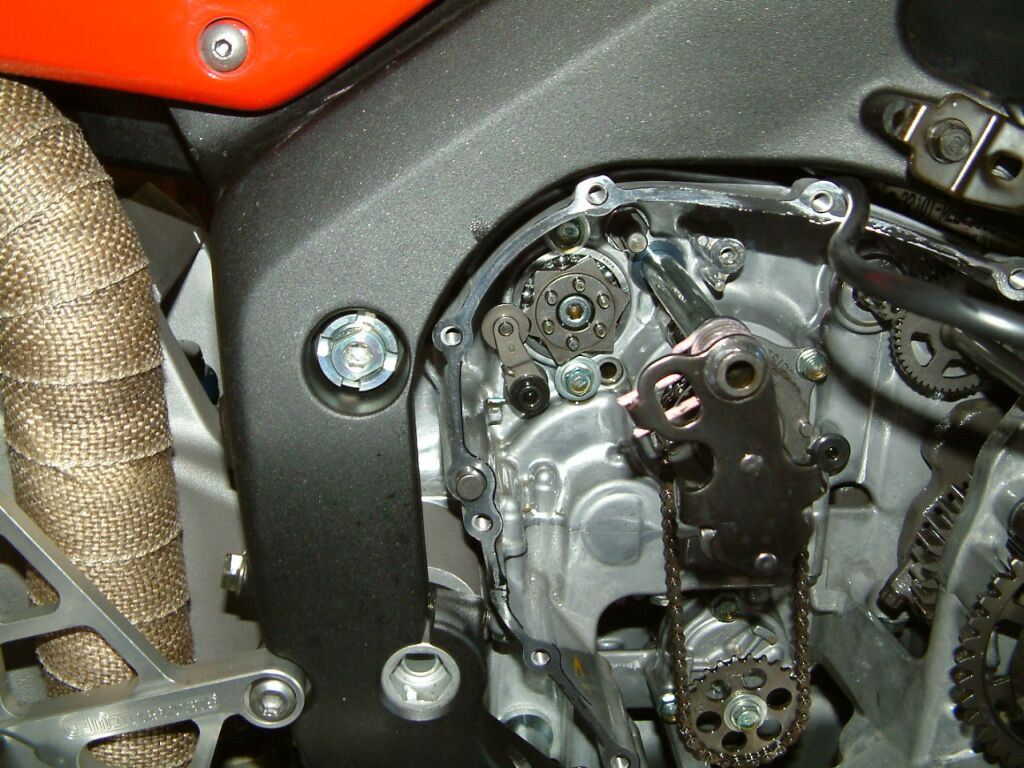
You have to remove the shift control arm attached to the rod on the left hand side of the bike so you can pull the rod out on the right. Pull the rod out about 2 inches, just so it's out of the way and you can get at the detent arm and spring.
Use a #5 allen wrench and remove the detent arm and spring. BE CAREFUL as there is a washer in the setup and you DON'T want to drop it into the oil sump.
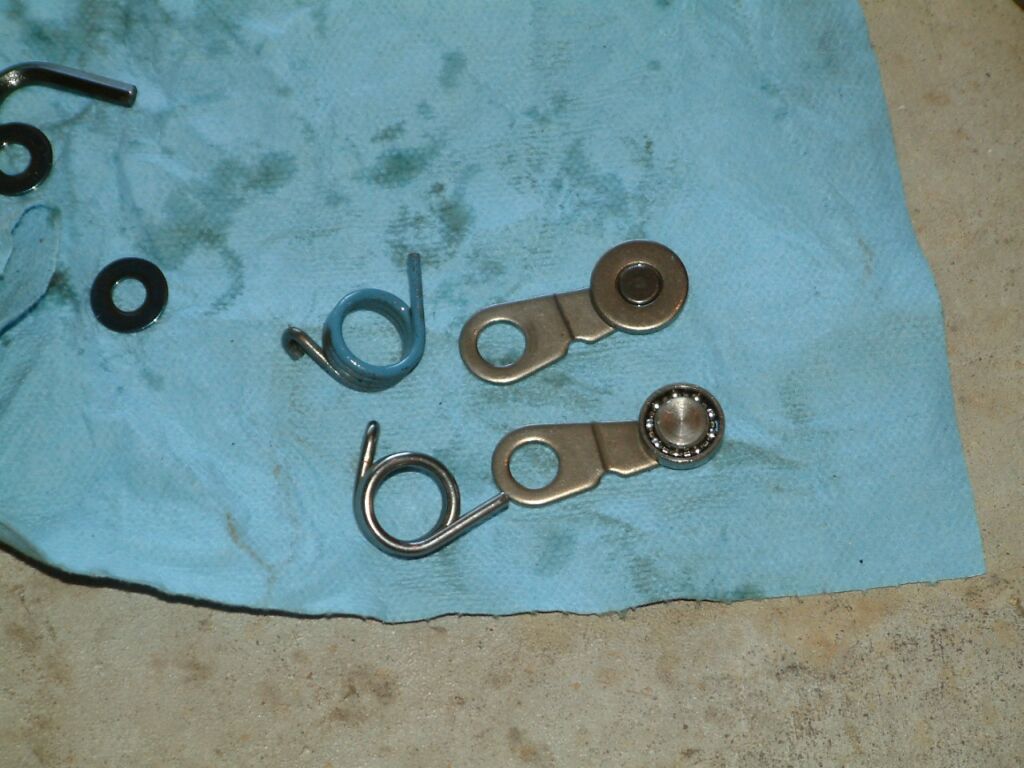
Here's a pic of the old and new pieces side-by-side. Note the ball-bearing configuration on the new piece, and although you can't see it well in this pic, the spring is MUCH stiffer.
Assembly is the opposite of removal. Make sure you use lock-tite and torque to recommended values.
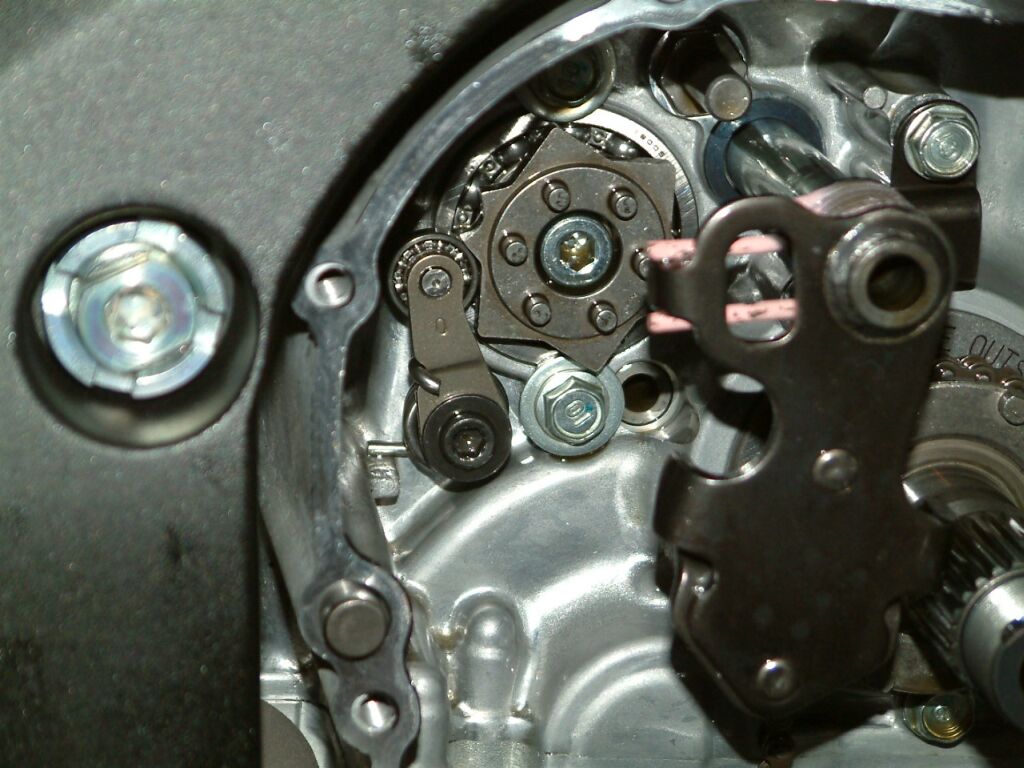
Here is the end result pic.
So, what did it do for me? Well, first off, it makes neutral a PAIN to get in to because it wants to jump right past into gear on either side (1st or 2nd), but this is good. In the end, it simply makes shifts quicker, easier and more positive.
Did you find this review helpful? Think it sucked? Tell us about it in the forum!
Copyright © 2005 Kufalk Media LLC - All rights reserved